
Tutorial: Winter Cat Shelter
Keep your feral friends warm this winter with an easy 1-hour craft!
Cat shelters can take many forms, but this beginner-friendly design is made of inexpensive materials — many of which you probably already have around the house.
This shelter's double-walled structure and multiple layers of insulation will help community cats stay warm and dry on even the most frigid winter nights.
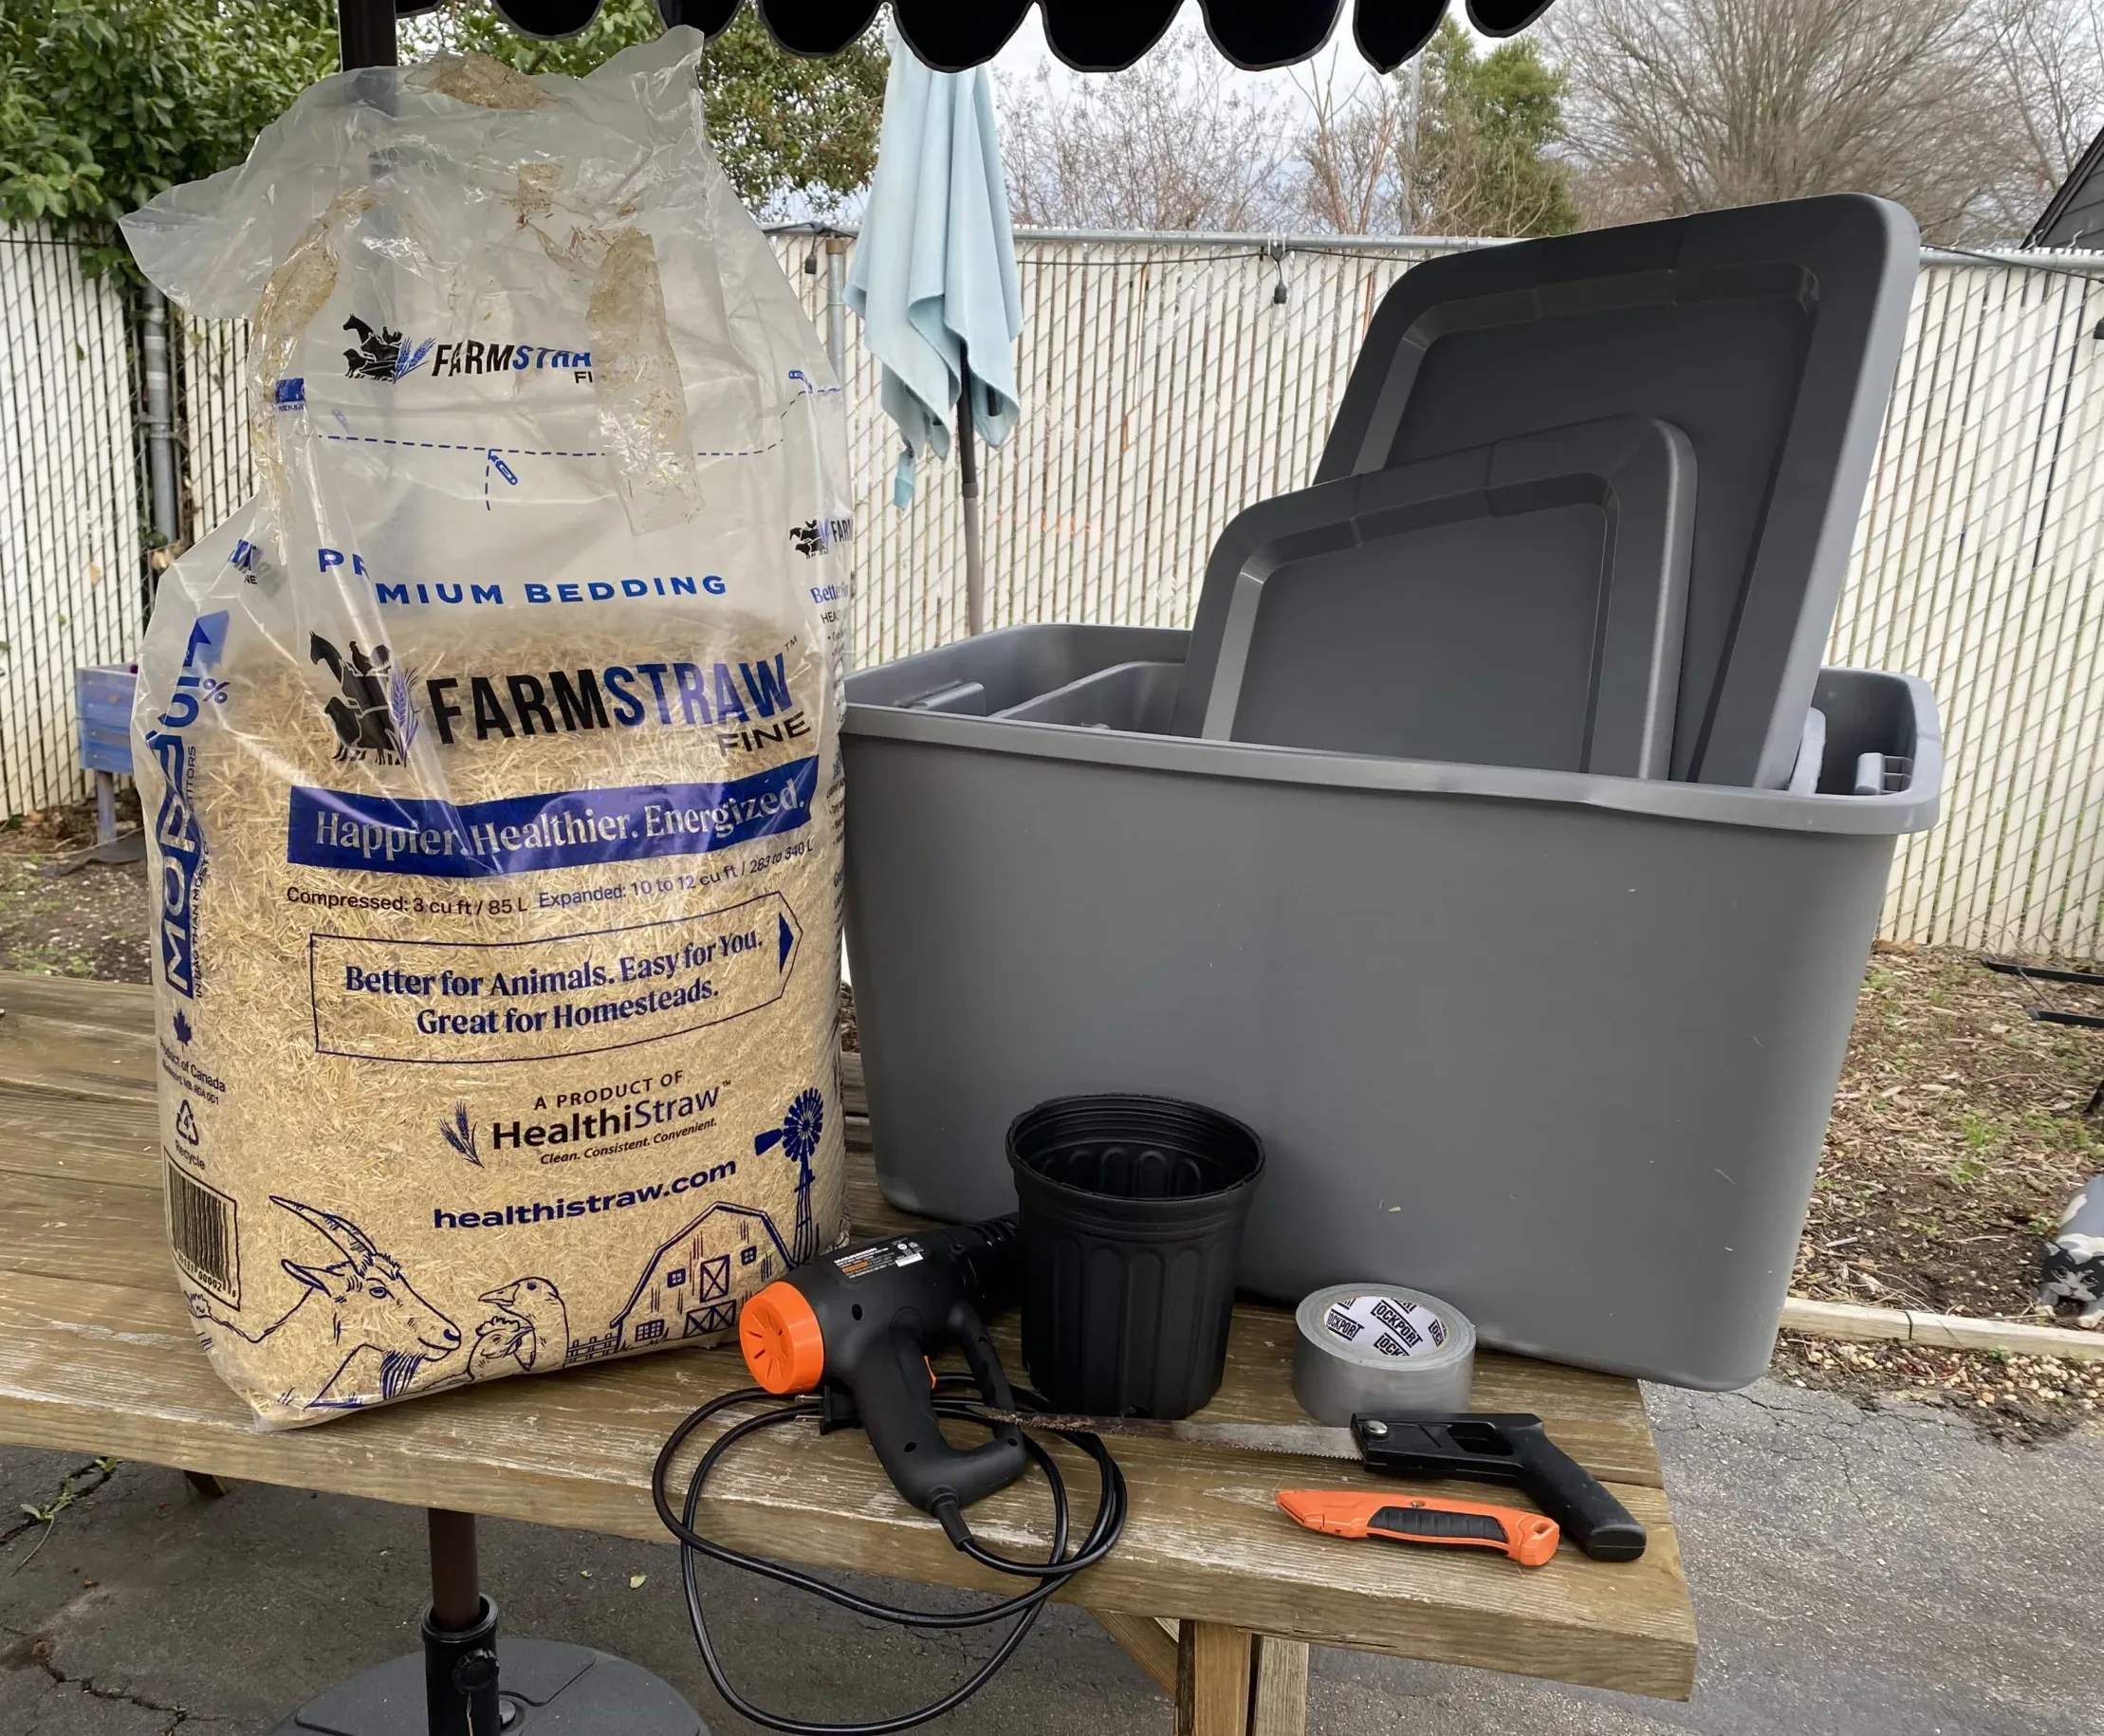
You will need:
- 2 plastic bins with lids. The smaller bin should be large enough for a cat to comfortably stand and turn around in, and the larger bin should be able to close with the entire smaller bin inside. We used 18 gallon and 30 gallon bins.
- A fair amount of scrap styrofoam
- Straw, untacked. We got ours at Tractor Supply. Note: Most straw is “tacked”, or chemically treated. Untacked straw is safer for cats and may also be labeled as “animal bedding”.
- Important: Do not use hay! Hay holds moisture, which will cool the kitty instead of warming him. Remember, "hay is for horses, straw is for strays". Blankets and towels should also be avoided because they insulate poorly due to retaining moisture and eliminating air pockets.
- Plastic plant pot (at least 5-6” in diameter)
- Box cutter or Xacto knife
- Duct tape
- Heat gun or hair blow dryer
- A knife or saw to cut styrofoam
- Cedar wood chips or cedar animal bedding
- Sharpie/marker
- Optional: camouflage spray paint
Remember to follow all safety warnings for your tools and materials to prevent any accidents!
Optional step before beginning:
Paint larger bin with a coat of camouflage spray paint, especially if the shelter will be placed in the woods or any area where humans or predators may be a threat.
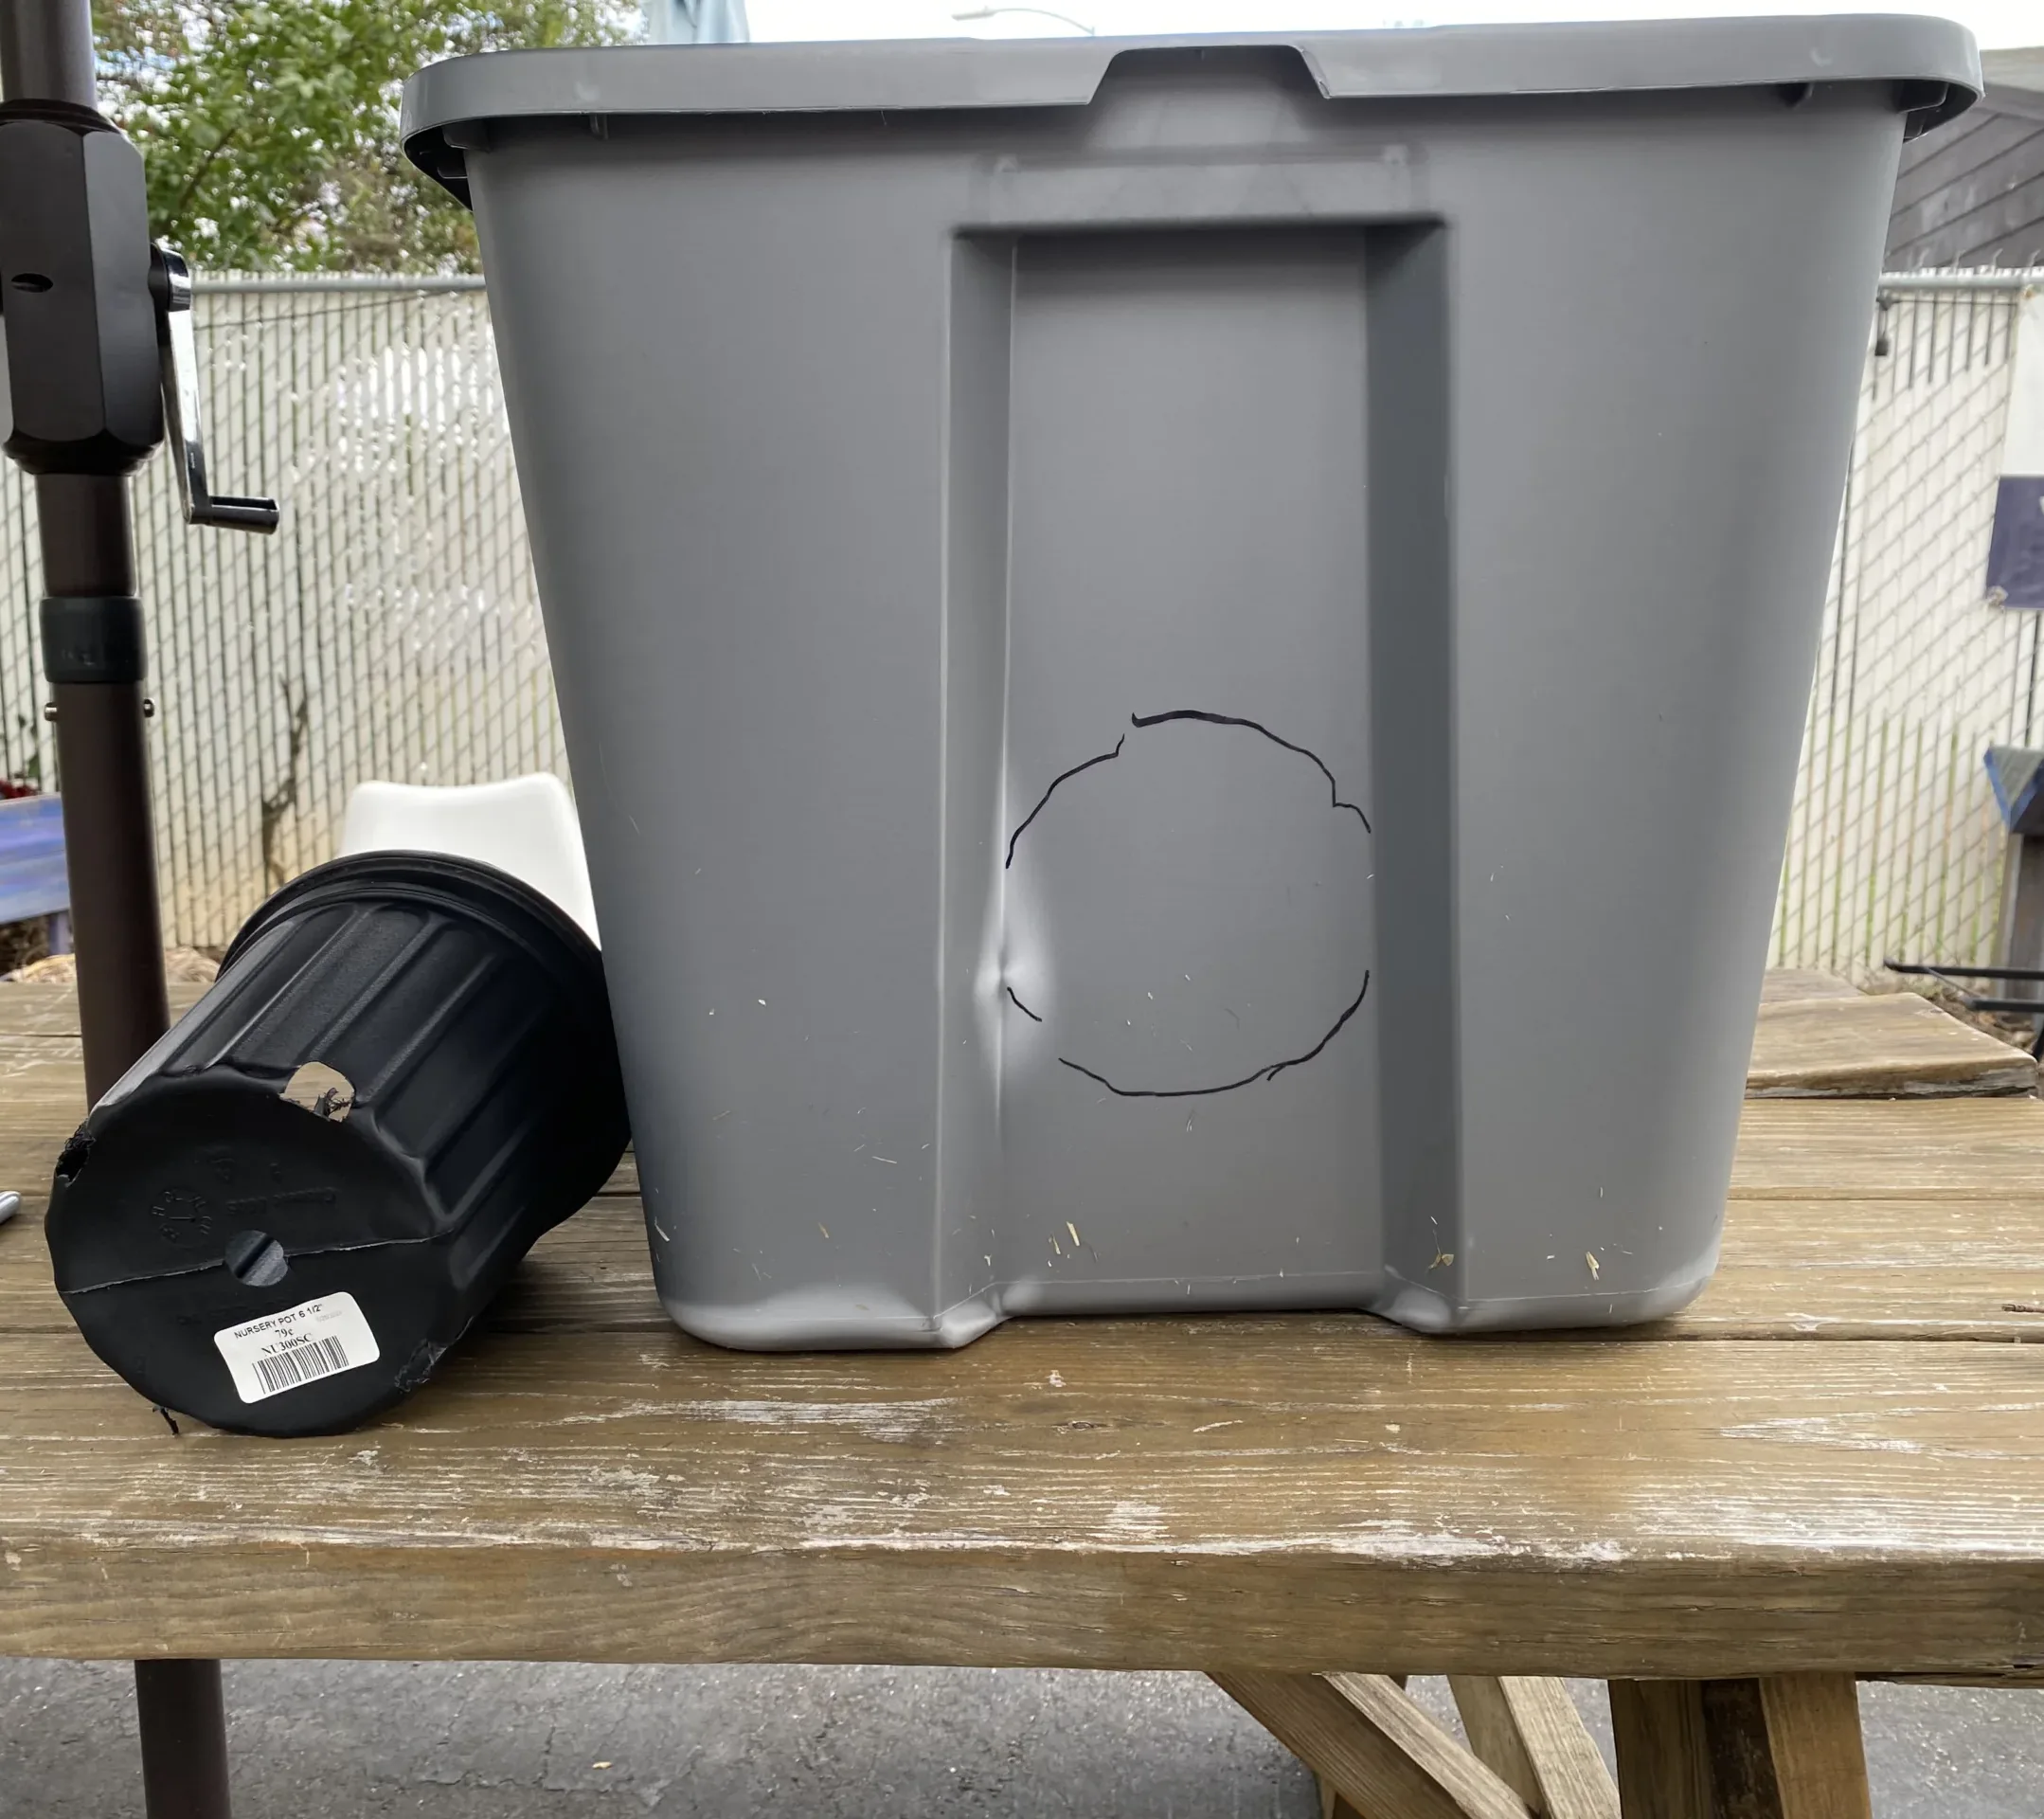
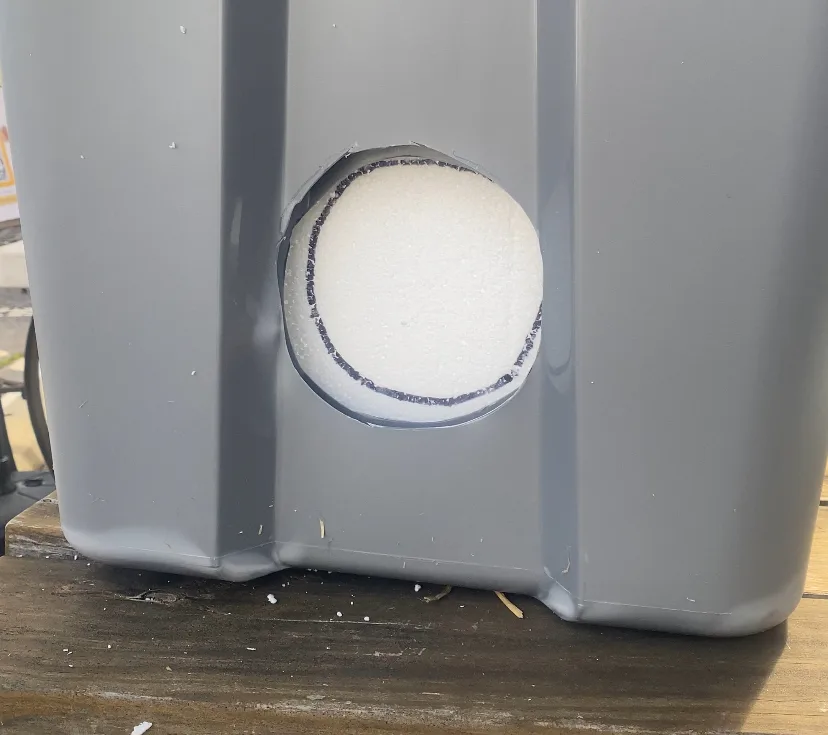
Use your marker to trace the circumference of the plastic pot on the large bin, a few inches above the base.
Working in sections, use the heat gun around the traced circle to soften the bin's material. (Be careful — heat guns can burn you and melt plastic!)
Carefully use the box cutter along the traced lines.
Repeat in sections until you have cut out the entire hole.
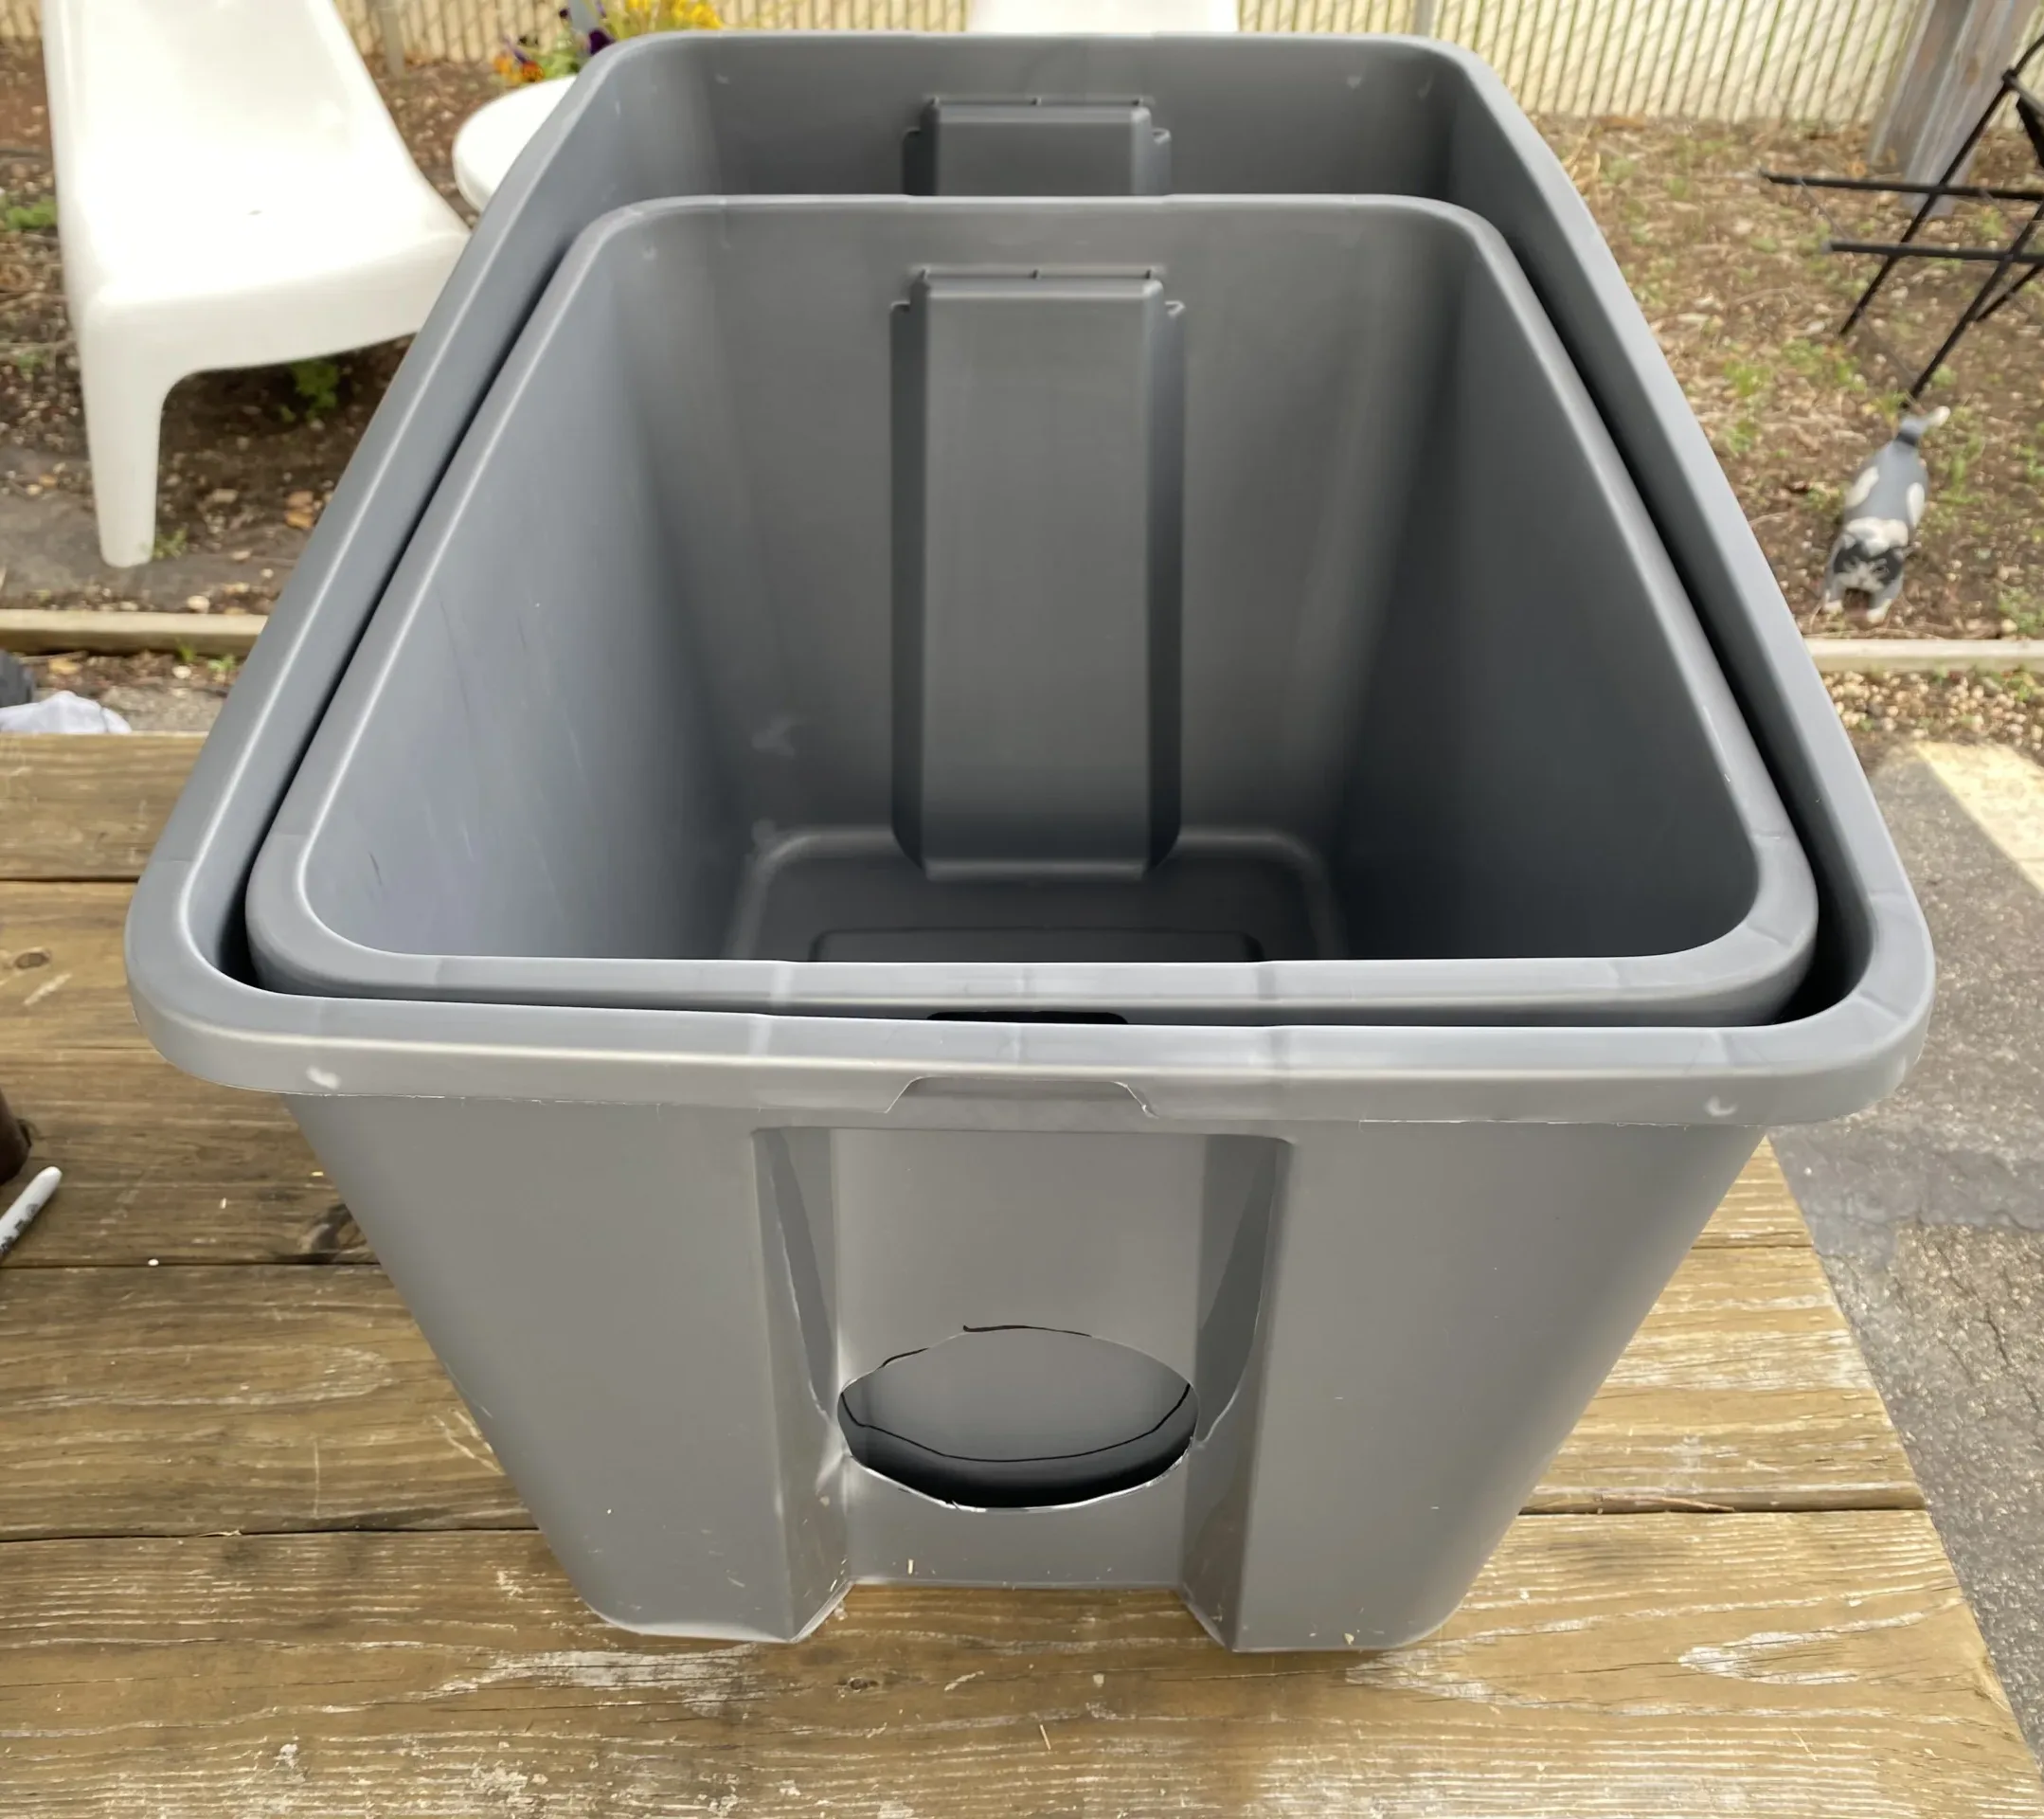
Place the small bin inside the large bin, pushed up to the front where you’ve just cut out your first circle.
Trace the same circle onto the smaller bin inside, and repeat the previous steps to cut out another hole.
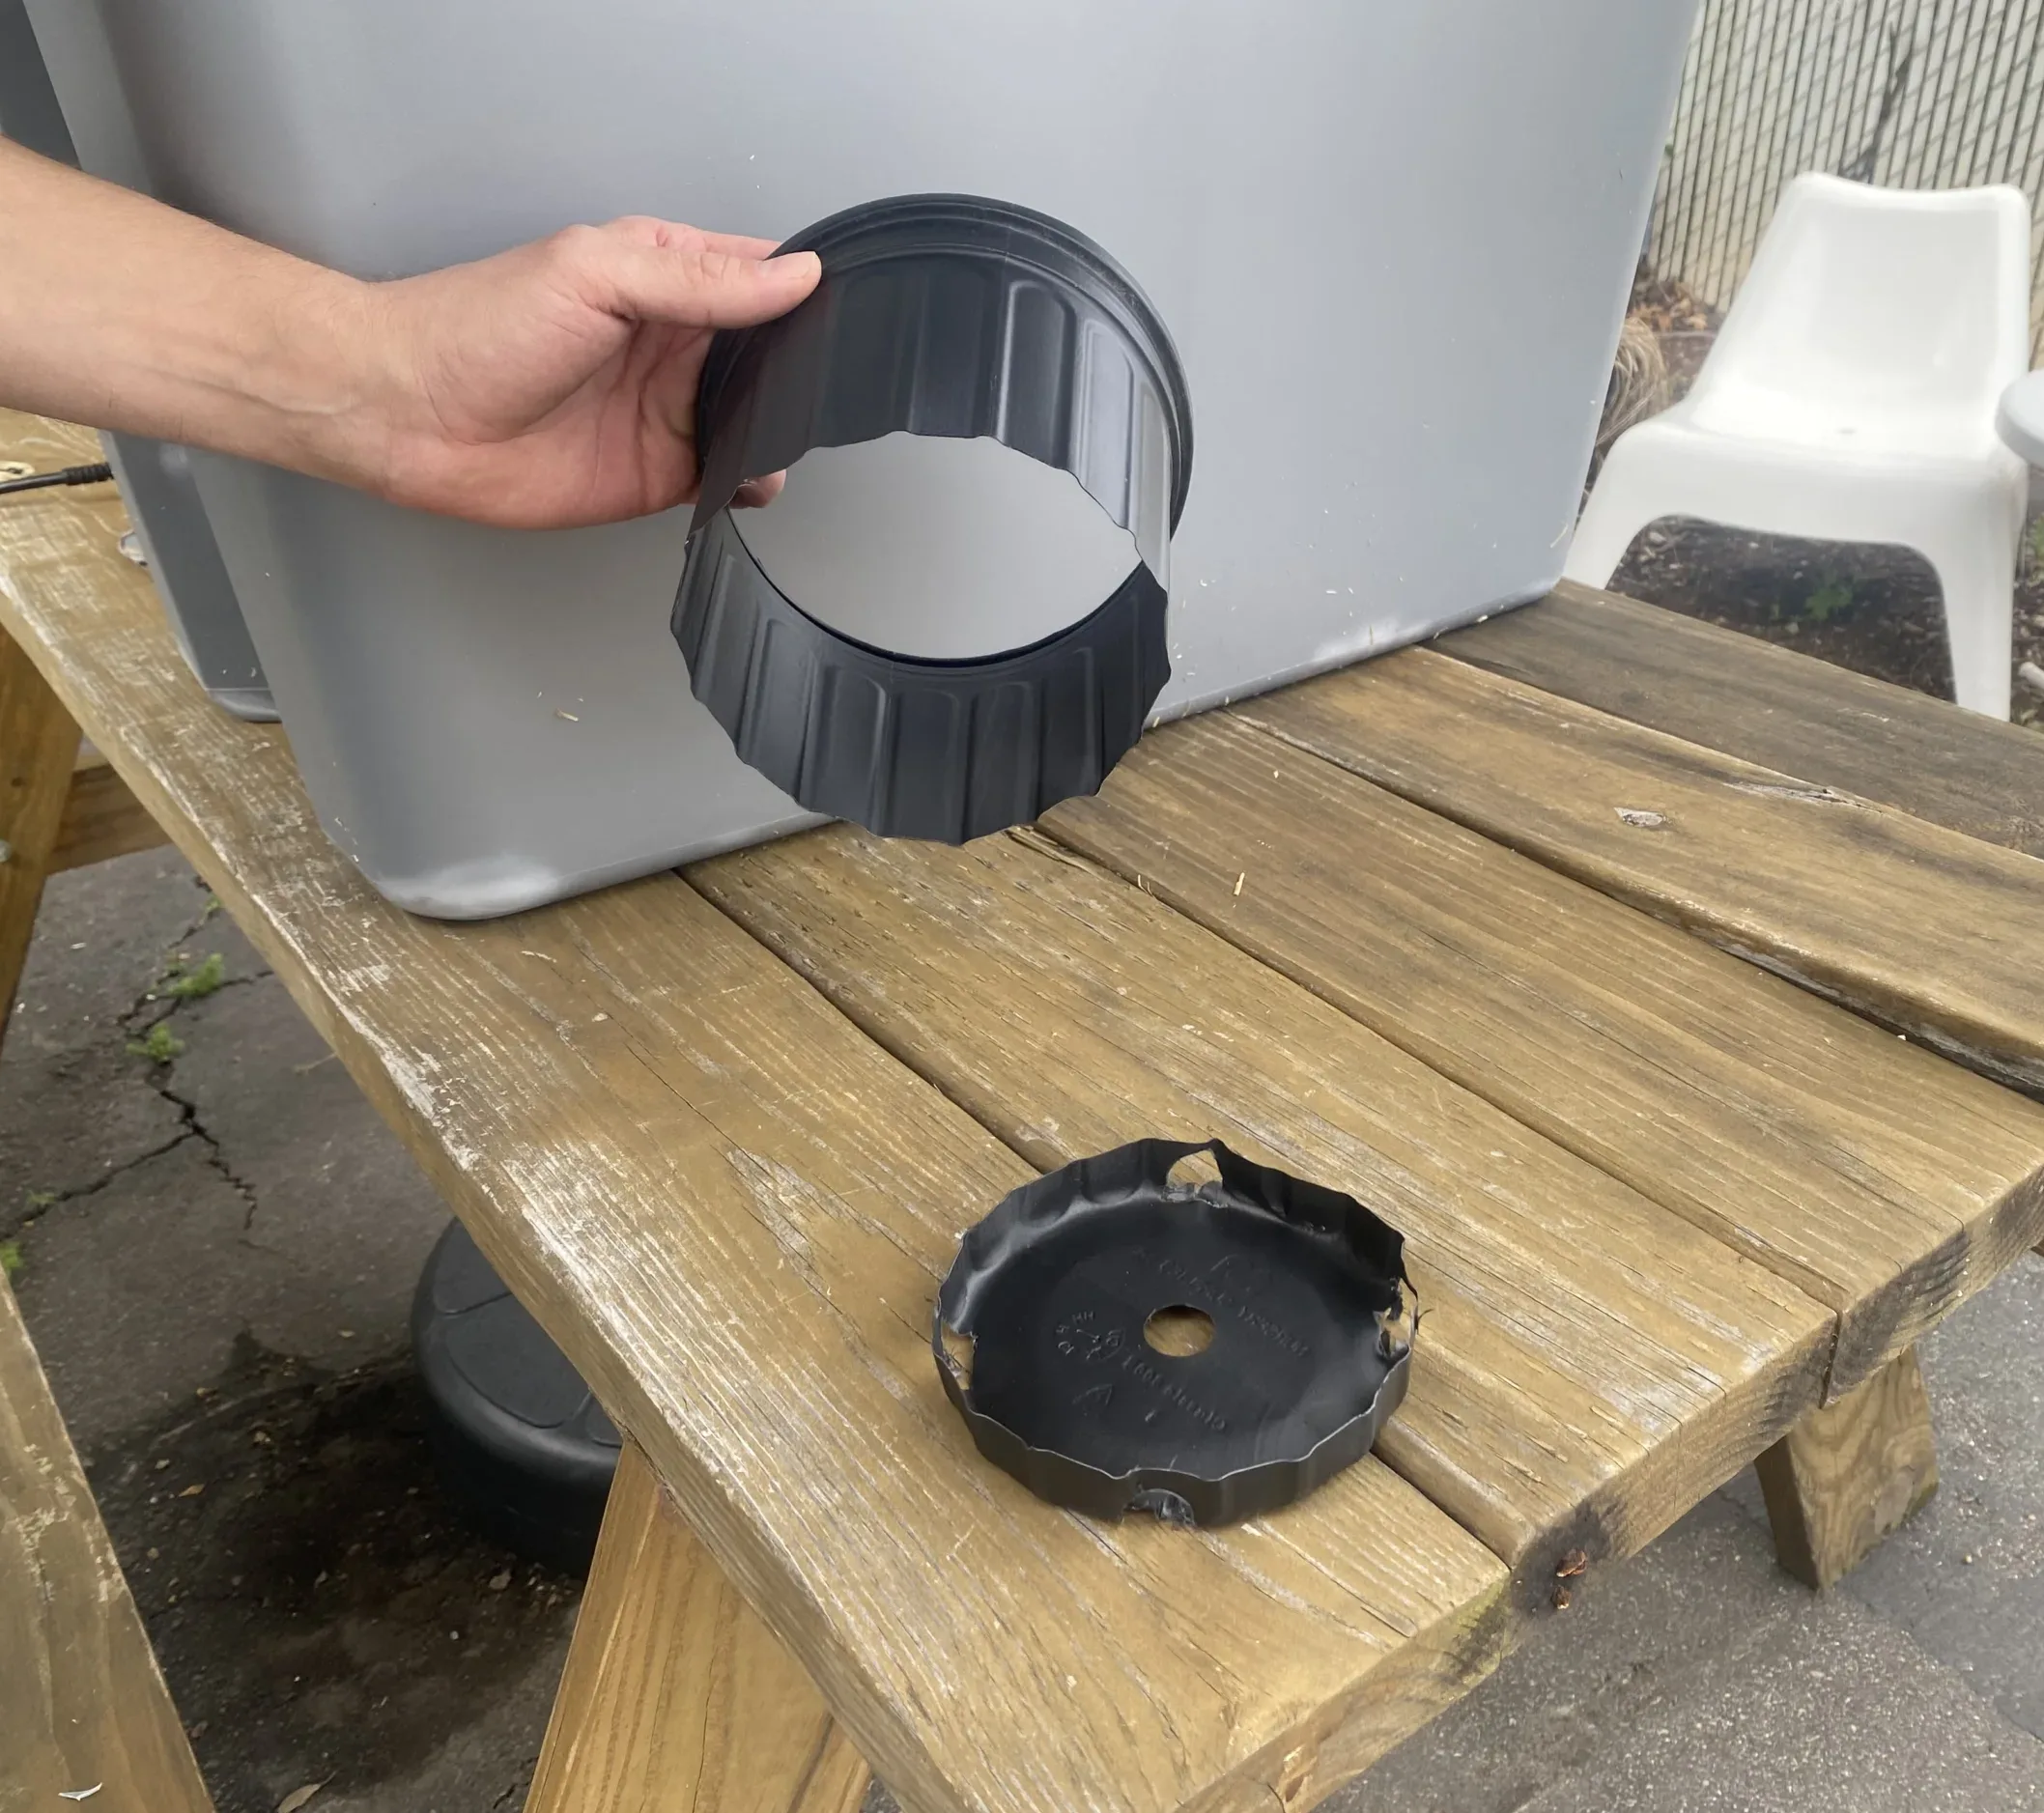
Use the box cutter to carefully cut around the circumference of the plastic plant pot just above its base. You should be left with a tube shape that the cat can use to enter and exit the shelter.
Remember — kitties come in different shapes and sizes! If you’re building for a particular cat, check that this tube is big enough for him to safely crawl in and out of. However, the hole should not be too big, or precious heat will be lost, and the cat will be more vulnerable to anything trying to get in his shelter.
Before proceeding, check the entrance size and fit.
Try inserting the tube entrance into the holes of your bins to check for size and placement.
Trim the holes on your bins as needed to ensure a good fit.
Once the size looks good, you can set the tube entrance aside for now.
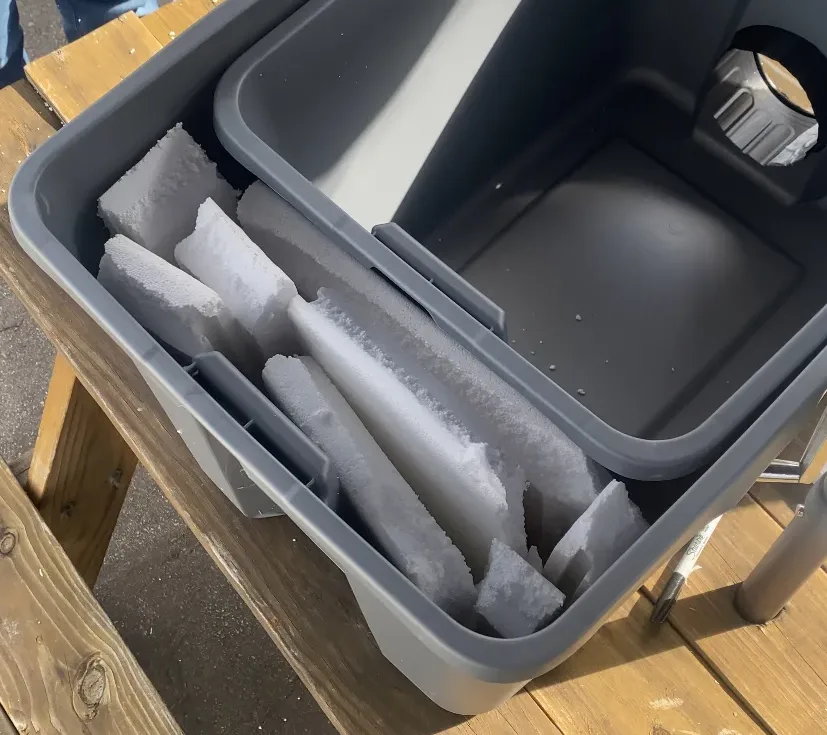
Use a knife or saw to break down some of your scrap styrofoam into smaller pieces. Use these pieces to stuff the empty spaces between the walls of your small and large bins. Be sure to leave some air pockets — this helps with insulation! You may also wish to add some straw to this space for additional insulation.
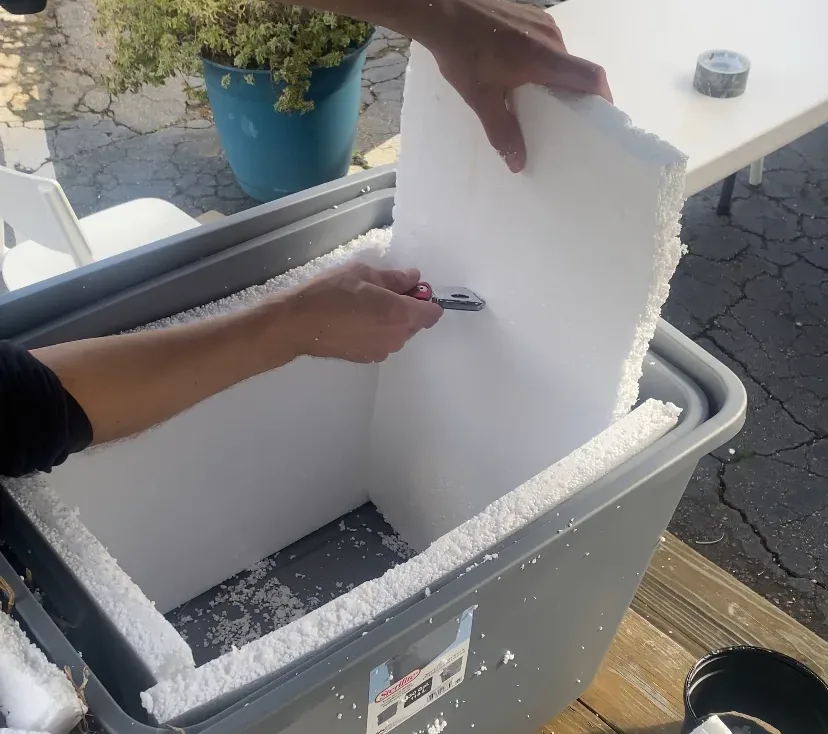
Break down more styrofoam into usable sizes to line all four inside walls and the floor of your smaller bin.
With the inner walls in place but not yet attached, use a marker to trace the entrance hole from the outside of your bin onto the styrofoam wall just behind it.

Use a knife or saw to cut out a hole where the entrance will be.
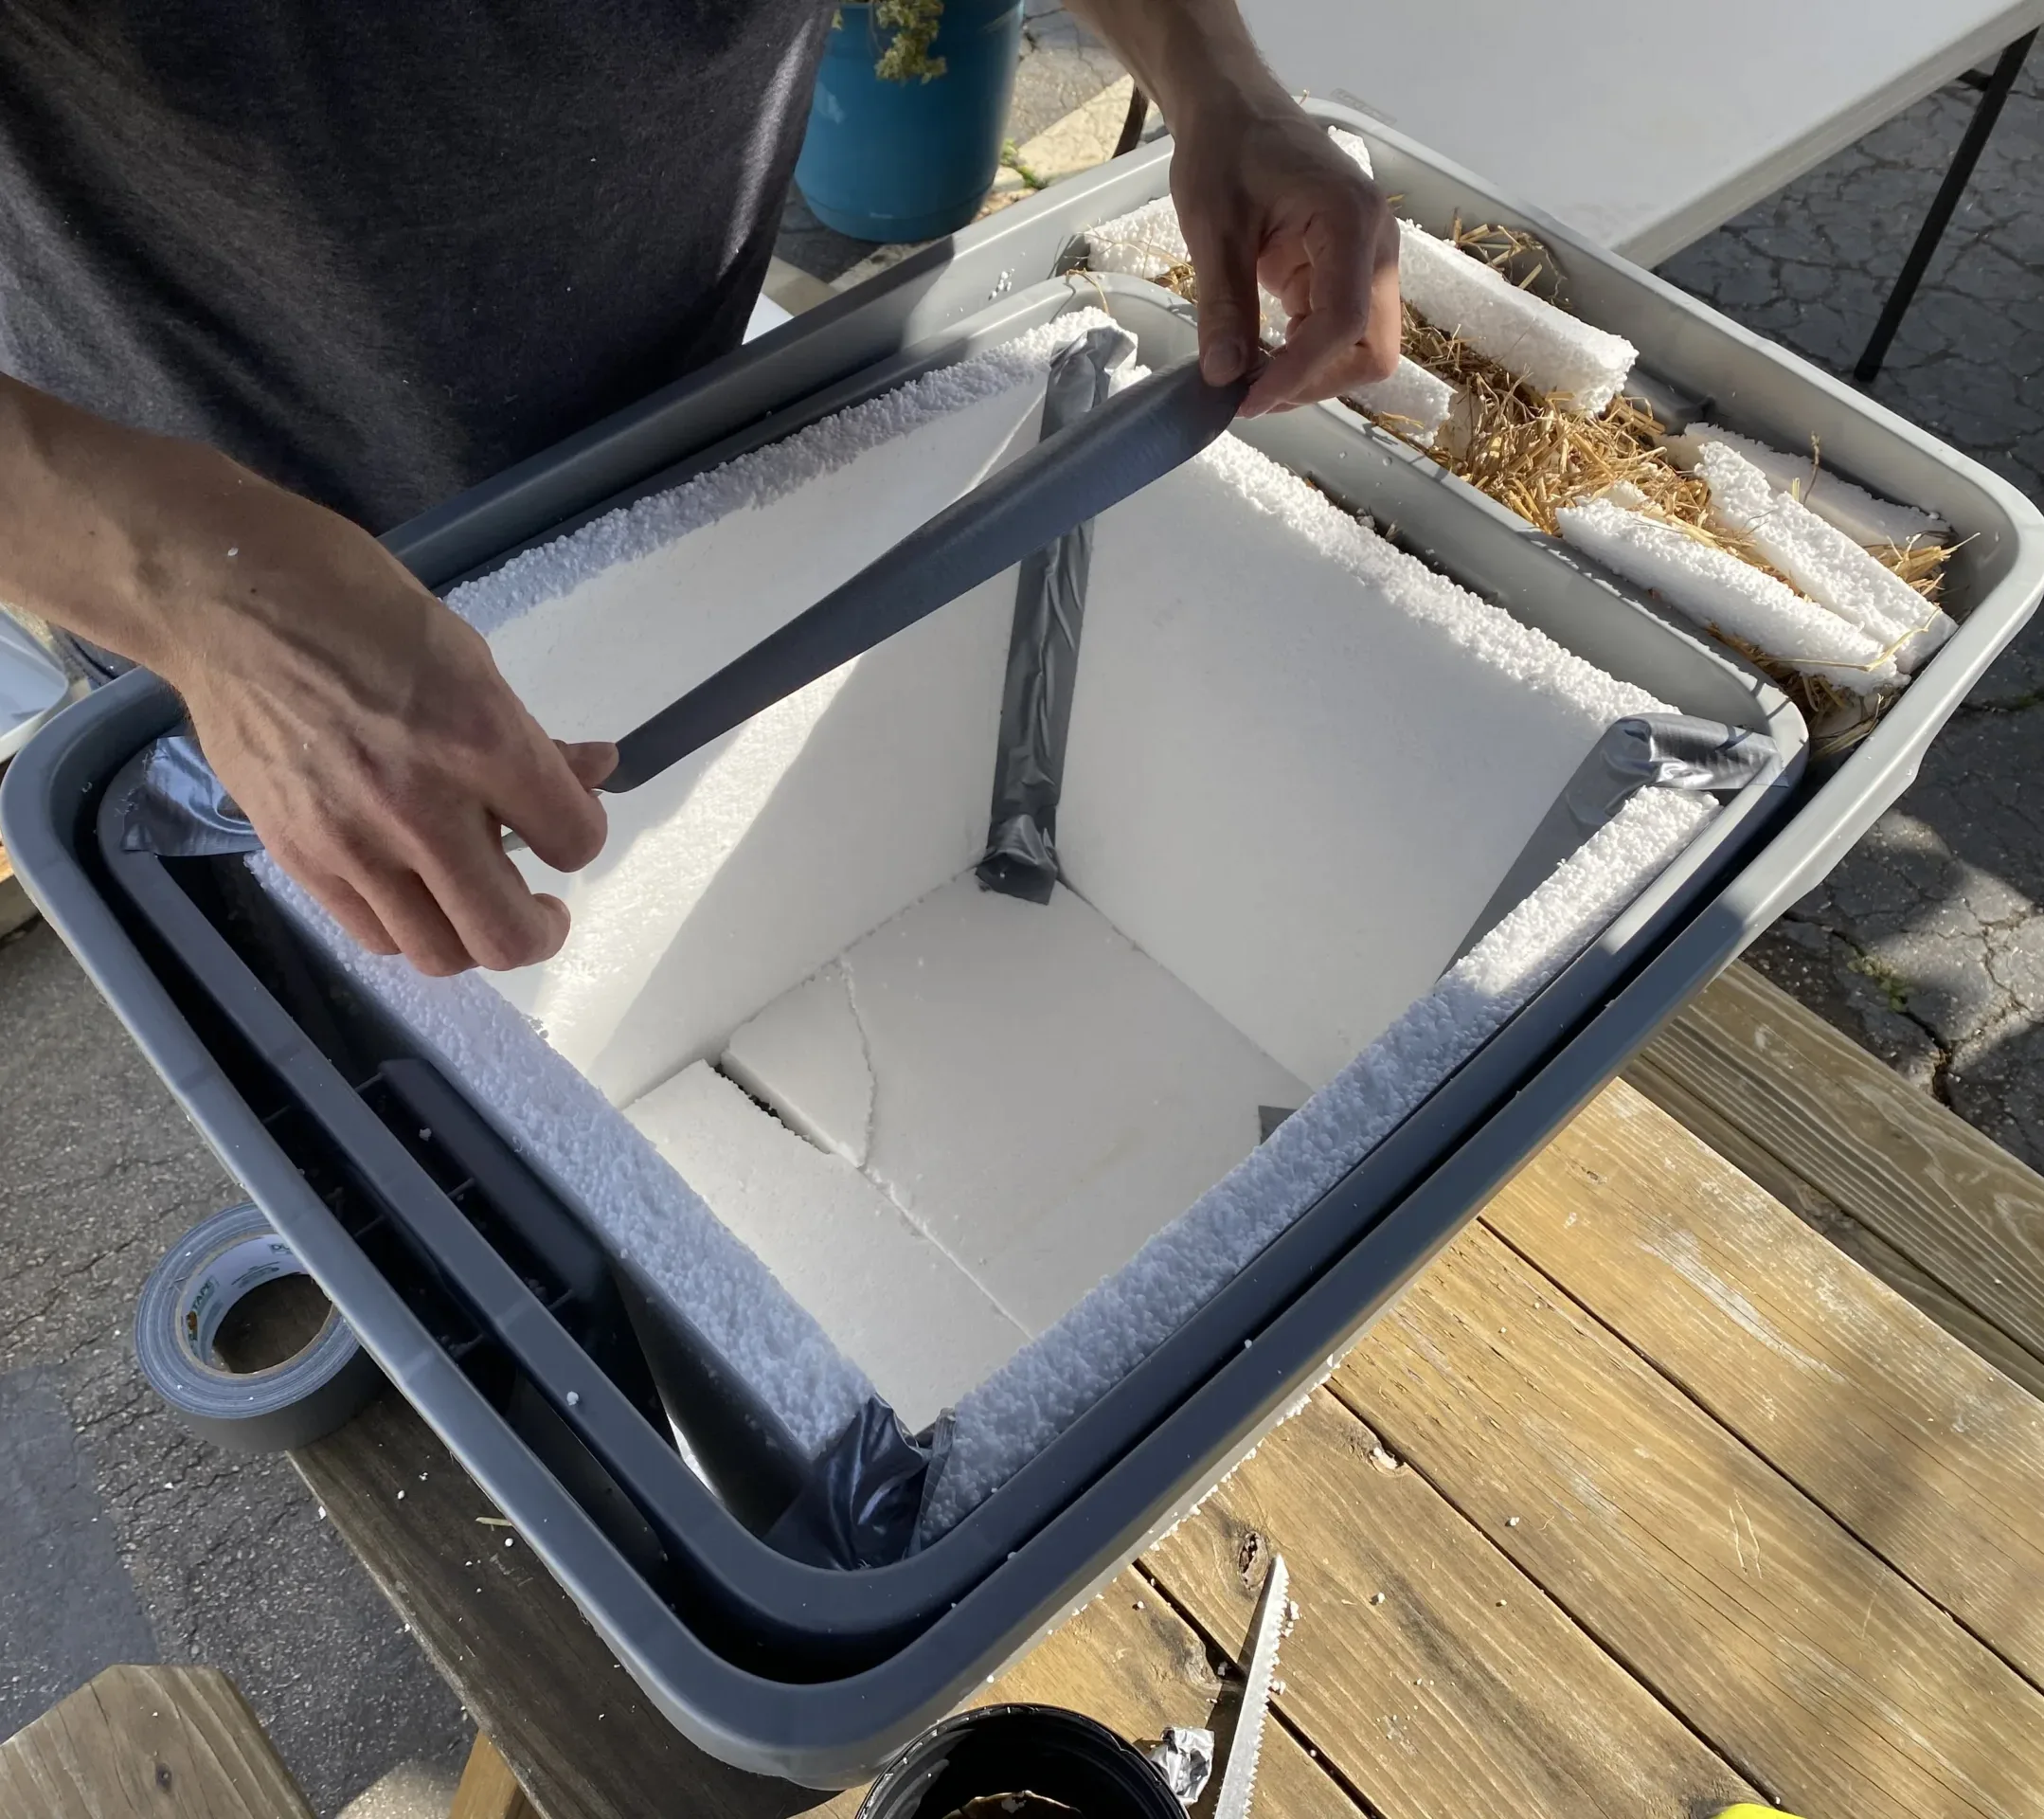
Now secure the styrofoam walls and floor of your inner bin with duct tape. Try to cover all seams and cracks, and secure the styrofoam around the top edge of the bin to keep things from being jostled around inside.
Vacuum up any loose styrofoam particles created by cutting — we don’t want our kitties to try eating them!
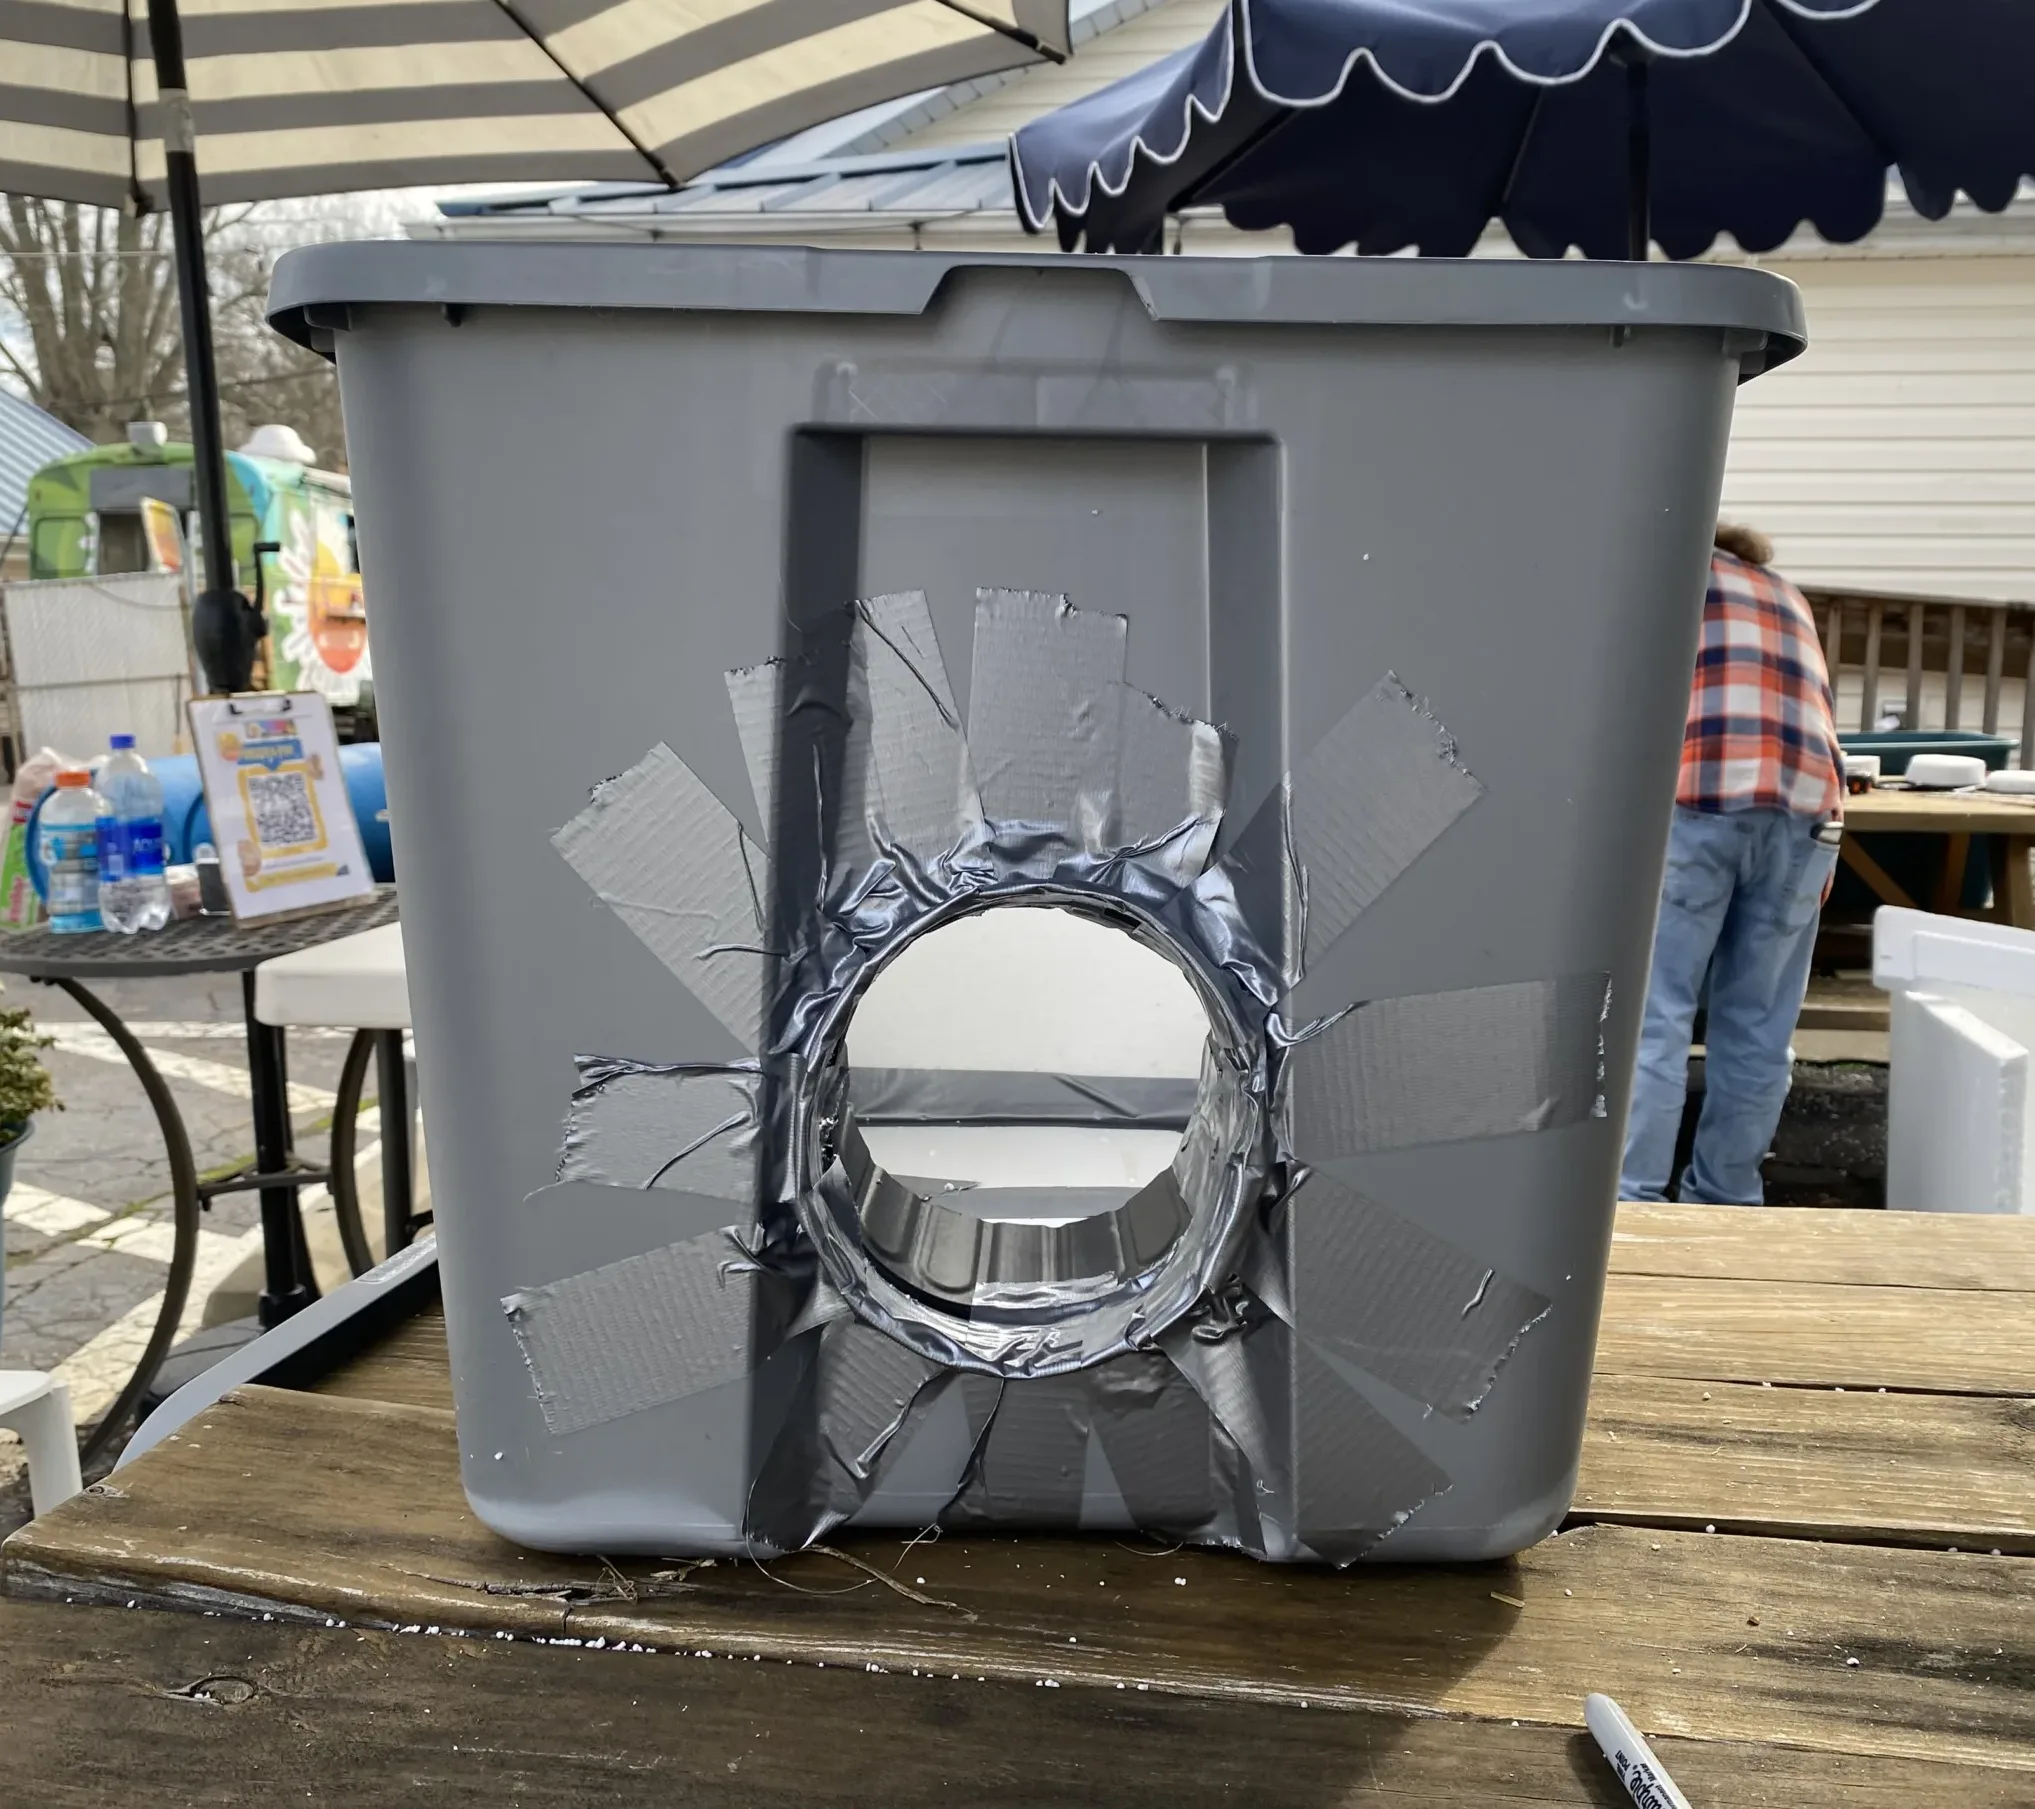
With bins and styrofoam in place, insert the plastic tube back into the entrance so that it goes through both bins and the inner styrofoam wall.
Allow the tube to stick out from the front of the bin by a couple of inches — this helps keep precipitation and debris out of the shelter.
Secure generously with duct tape (from the inside and outside). Use additional duct tape to cover any cut or jagged edges.
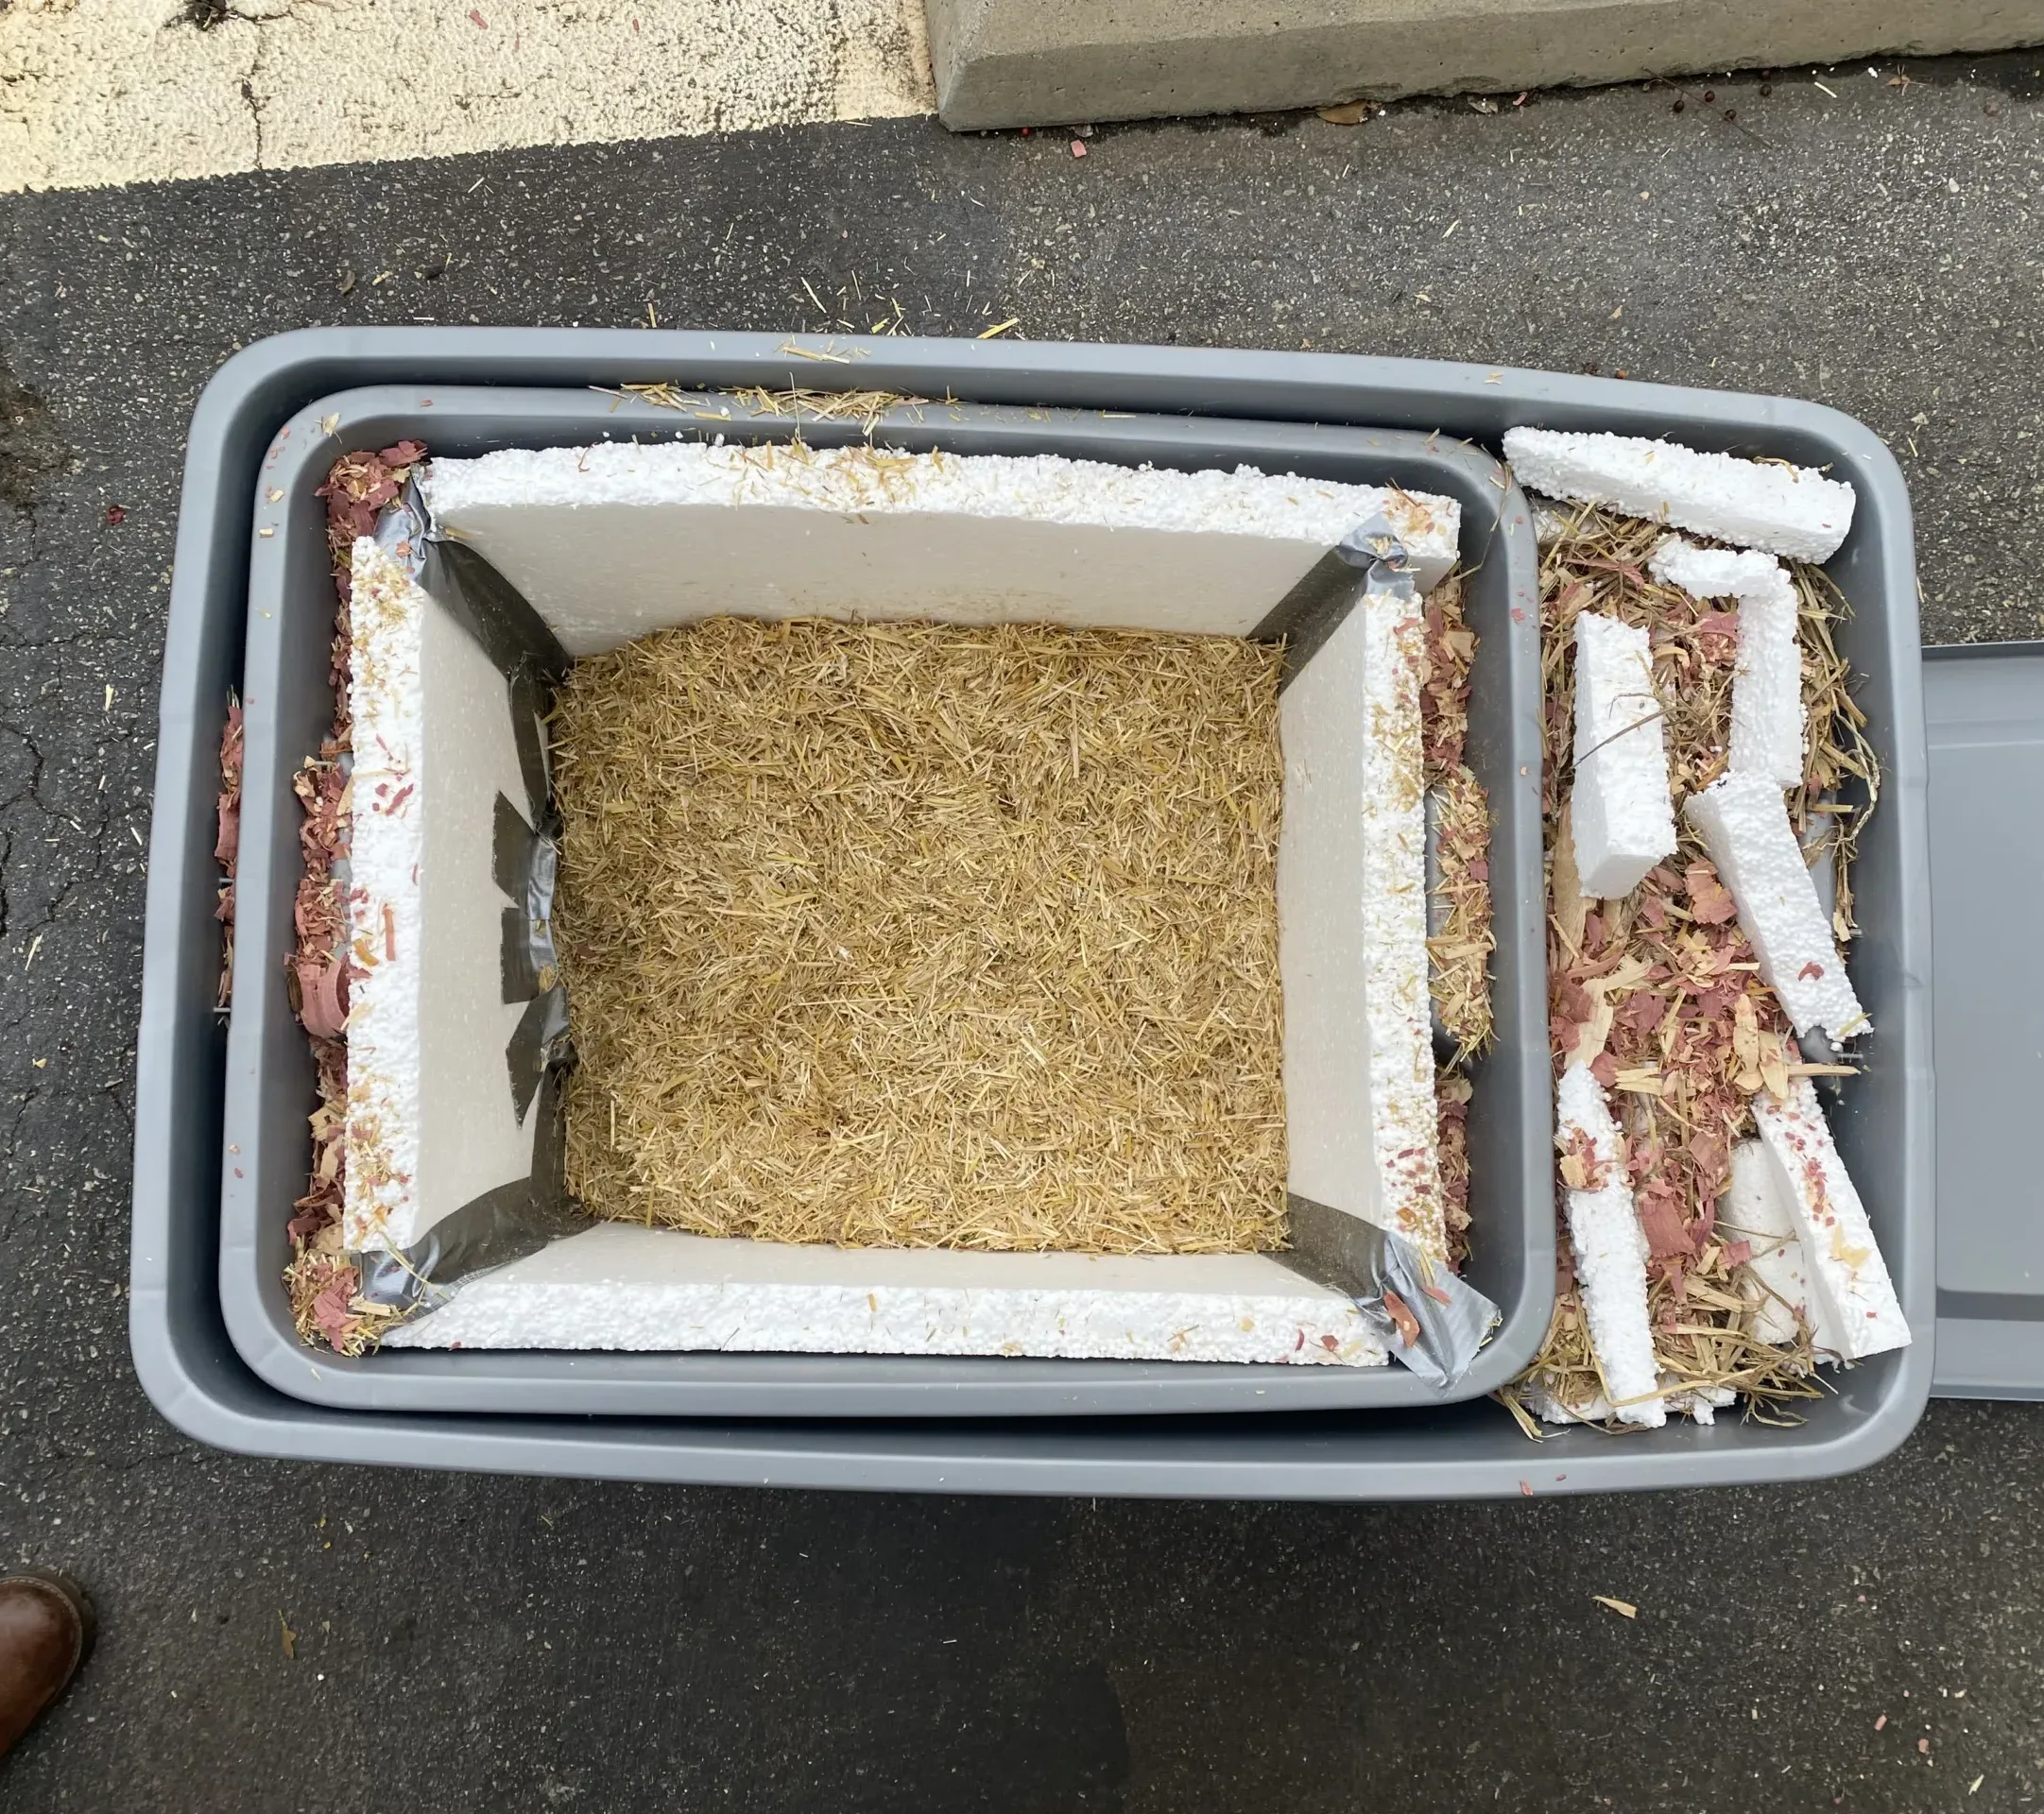
Fill the inner bin with a generous amount of straw. Add a sprinkling of cedar chips/bedding in the inner bin and in the other spaces to repel bugs.
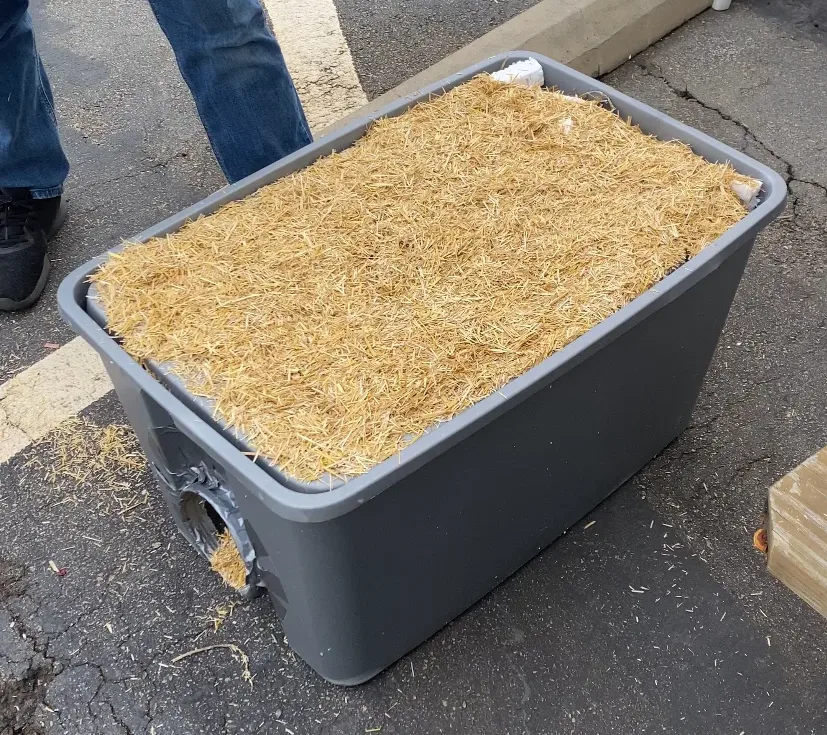
Place the small lid over the small bin. Spread more straw on top of the lid for insulation.
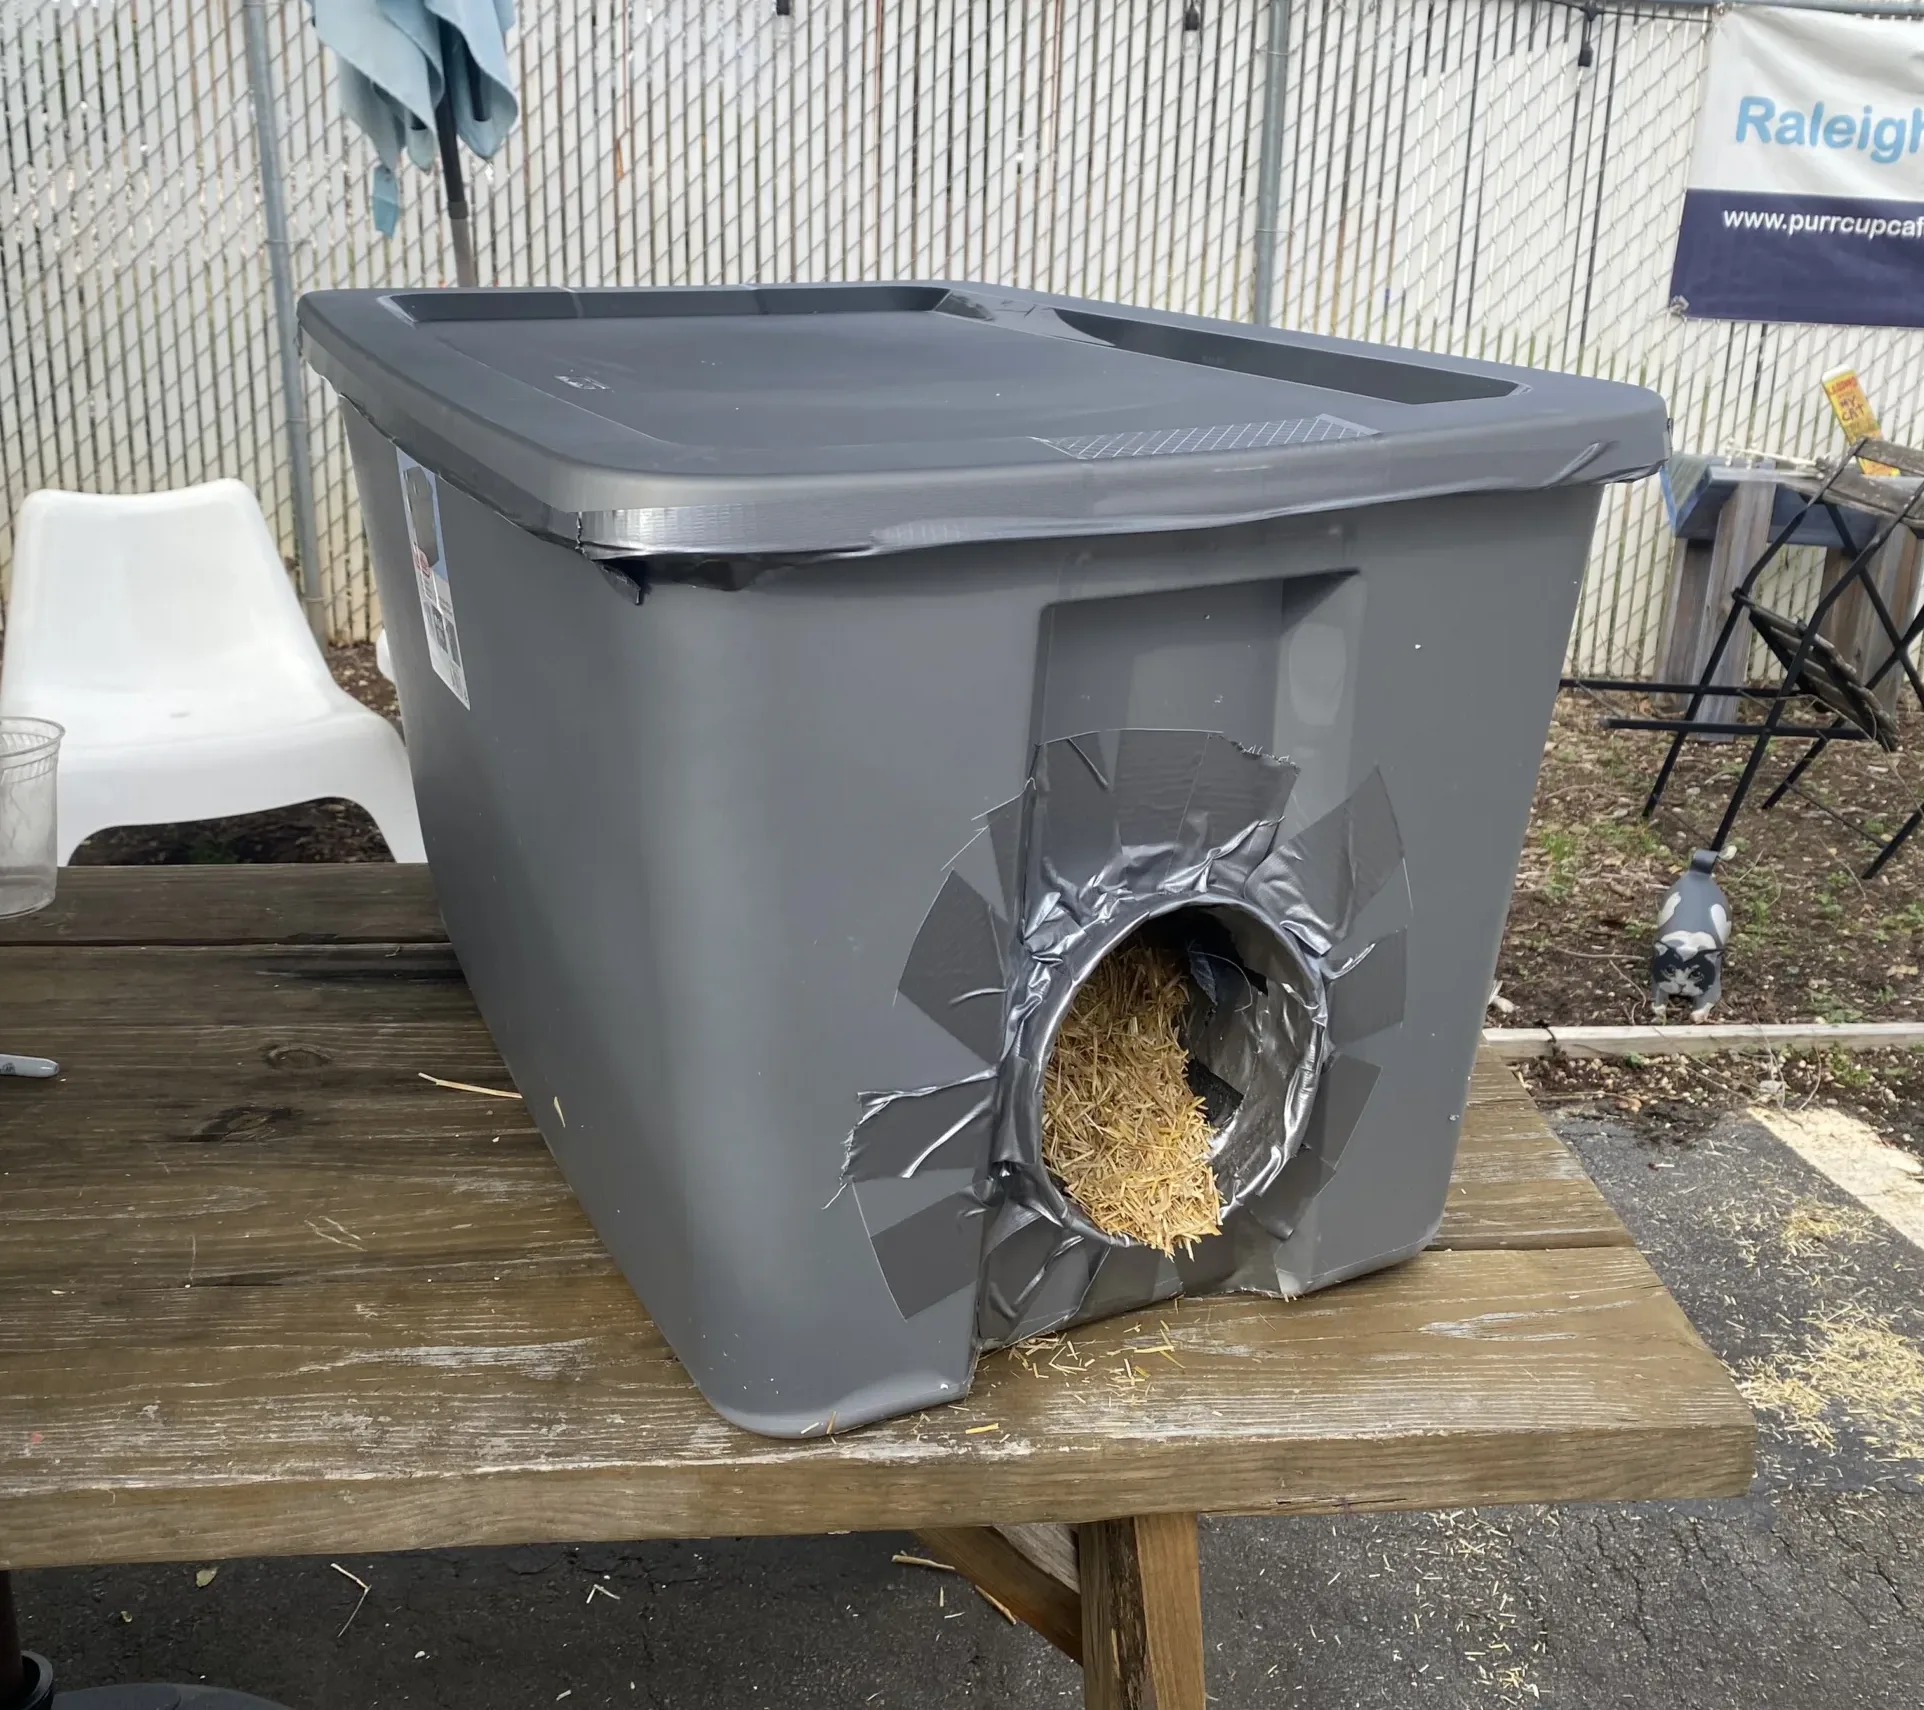
Place the large lid over the large bin and secure on all sides with duct tape.
Place your shelter in an area you know is frequented by community cats.
Camouflage the shelter as best you can using nearby structures, bushes, trees, or leaf litter. Predators (and even humans) may be inclined to interfere, so a hidden shelter is a safer shelter.
Maintain by replacing straw about every 3 months.
Questions? We'd love to help!
Contact our Community Cat experts through our Pet Helpline.